Taiko 3DS3 Custom Songs
See this mod in action
These instructions have been applied to create a Taiko 3DS3 modpack! Check it out here.
This tutorial covers adding custom songs into Taiko 3DS3 ("Dokodon! Mystery Adventure") by converting user-made TJA formatted files to Namco's fumen format. The process described in this guide requires a reasonable amount of manual effort.
This process works by replacing existing songs in the game (not by adding them as DLC). As this is done via LayeredFS, the replacement can be removed at any time. Note that song names displayed in the game are not handled by this converter, since they are images.
TJA compatibility information
The converter that we will be using (Okku) is incompatible with charts that use branched paths, charts that use custom scroll commands, and charts with over 300 bars or 13,000 notes.
While Okku will try its best to properly calculate score and soul points, it won't be identical to a Namco-created song.
Save data warning
Since base songs are replaced by custom ones, getting a greater score than legitimately possible will result in that score staying forever, even if the LayeredFS mod is removed. Therefore, it is highly recommended to back up your save data with Checkpoint or JKSM before replacing any songs.
Prerequisites
- A modded 3DS running a modern CFW environment
- These instructions should work on any Luma3DS version with LayeredFS support (7.0 and greater), but anyone on an older Luma version should still update their setup to the latest
- A digital or cartridge copy of Taiko 3DS3 ("Taiko no Tatsujin: Dokodon! Mystery Adventure")
- The TJA file that you would like to convert
- A computer or virtual machine running a modern version of Windows
- These instructions have been tested on Windows 10 and 11
What you need
- The latest release of Okku
- This package comes in RAR format. You should use 7-zip to extract it because WinRAR is awful.
Section 0: Computer setup
No repeat required
This section only needs to be done once. If you have already done this to your computer, you can skip this section.
As TJA files tend to come with Japanese text, files need to be extracted with a computer set to Japanese locale, or else mojibake will be generated in its places. Naturally, the converter won't appreciate this very much.
About changing locale
Changing your system locale does not change the system's display language, but it will change backslash symbols to the Yen symbol in command prompt as well as cause some application installers to initially display in Japanese.
You will need administrator access on your computer to change the system locale.
- Hit Windows key + R to open up the Run dialogue, type
intl.cpl, then click "OK".

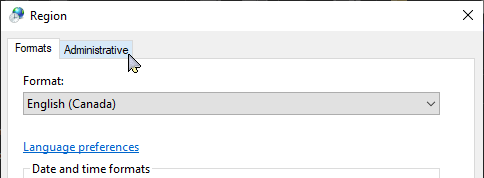
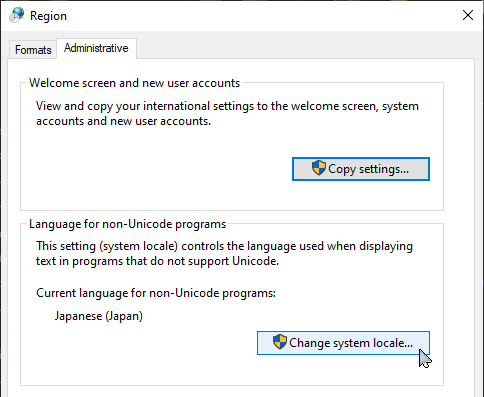
- Click on
Administrative, thenChange system locale.
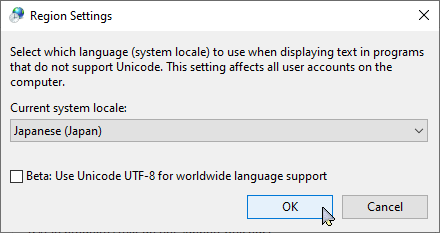
- Use the dropdown to change the system locale to
Japanese (Japan), then click OK. Ignore the Unicode UTF-8 checkbox.
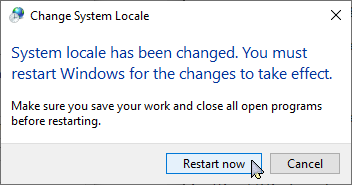
- You will be prompted to restart your computer. Click
Restart nowto restart your computer.
You should also enable file extensions using File Explorer to avoid any potential ambiguities with file names. See the image below for how to enable file extensions. On Windows 11, you can enable them from View -> Show -> File name extensions.

Section 1: TJA encoding
Okku requires that TJA files be encoded as UTF-8. You can do this in bulk with a tool like KanjiTranslator, but this tutorial will cover manually re-encoding the file with Notepad.
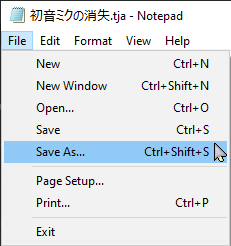
- Double-click your TJA file and open it with Notepad.

- Click
File, thenSave As.
- Change the encoding to
UTF-8, then clickSave.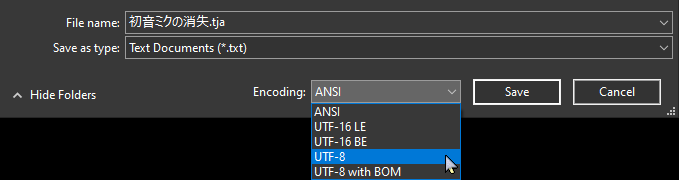
Section 2: Okku
In this section, we will convert your TJA file and its audio to Namco's file and audio format so that it will work in a 3DS.
- Navigate to
3dsTaiko -> Okku, then double-click onOkku_Converter.exe. You should see a command prompt window open, followed by a File Explorer window.- If Okku fails to launch, you may not have the VC Redistributable pack installed. Double-click on the
VC_redist.x86.exefile in the same directory and follow its installation instructions, then try again.
- If Okku fails to launch, you may not have the VC Redistributable pack installed. Double-click on the
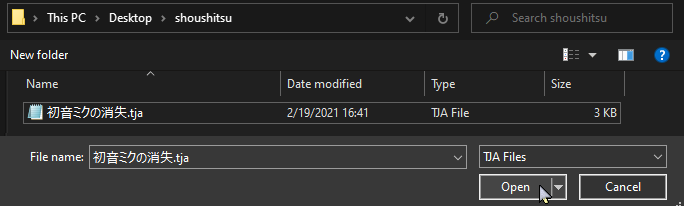
- Navigate to the location of your TJA file, then click
Open.
- Okku will display the song name, its subtitle, and its list of difficulties. Verify that the information corresponds with the TJA you are trying to convert, then select the difficulty that you want converted.
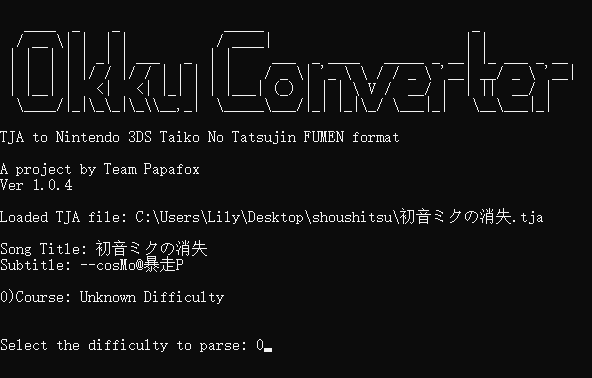
- Okku will show a few boxes, then output
Done!once it has succeded. At this point, Okku can be closed and the converted files will be in the same directory as the original TJA and audio file.
Converting multiple difficulties
If you're converting multiple difficulties for one song, keep in mind that Okku will constantly overwrite the last converted file. Therefore, you should move the generated files elsewhere between each convert. My personal recommendation would be to create another folder with the song's name and to name the fumen files by their difficulty so you don't mix them up (though, worst case scenario, you can usually guess based on file size).
There is no need to convert audio multiple times, so once you've converted an audio track once, you should move the audio file that is accompanying the TJA file somewhere else. Okku will warn you for further charts that the audio is missing - accept the warning and it'll convert the chart quickly as there is no audio to convert.
Section 3: Song replacement
In this section, we will use LayeredFS to replace a base song in the game with your newly converted file.
- Double-click on
3ds_Folder_structure.7zfile inside of3dsTaikoand extract its contents to the root of your SD card.- The root of the SD card is the initial directory where you can see the
Nintendo 3DSfolder, but aren't inside of it. - You can also do this wirelessly via FTP, but it'll be a lot slower as the folder structure involves many empty folders.
- The root of the SD card is the initial directory where you can see the
- On the 3DS SD card, navigate to
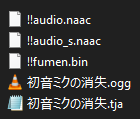
luma->titles->0004000000190E00->romfs->_data->sound->song. - This is the hard part: Rename your converted
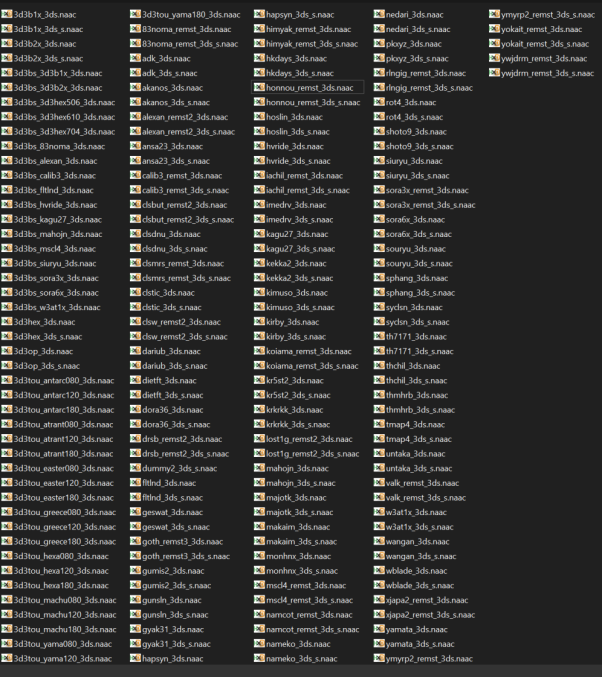
NAACfile to the name of an actual, existing song. The smaller file (!!audio_s.naac) is the song sample that plays in the song select screen, while the larger file (!!audio.naac) is the full song.- For a list of base song IDs in Taiko 3DS3, see this image.
- For a list of song IDs by where they show up on the song select screen, see this page.
- For other cases, see the song ID list on wikihouse.
- In our example, I'll use ハッピーシンセサイザ (Happy Synthesizer), whose song ID is
hapsyn. - A number of songs add
_remstor_remst2to the file name. For example,ymyrp2_remst.naac.

- On the 3DS SD card, navigate to
luma->titles->0004000000190E00->romfs->_data->fumen-><song ID of the song that you replaced>->solo. Rename your fumen file (!!fumen_.bin) to<SONG ID>_<e/n/h/m>.bin.- e = easy (かんたん)
- n = normal (ふつう)
- h = hard (むずかしい)
- m = master (おに)
- if applicable, ex = extra (裏)
_remst/_remst2logic does not apply for these file names. For example, the master chart fumen forymyrp2would still beymyrp2_m.bin.
- Take out your SD card and put it into your 3DS.
Success!
Your song replacement should now appear for the song that you have replaced! Don't forget to enable game patching in the Luma3DS configuration menu (hold SELECT on boot) so that LayeredFS can apply.
Credits
- Team Papafox for the creation of Okku